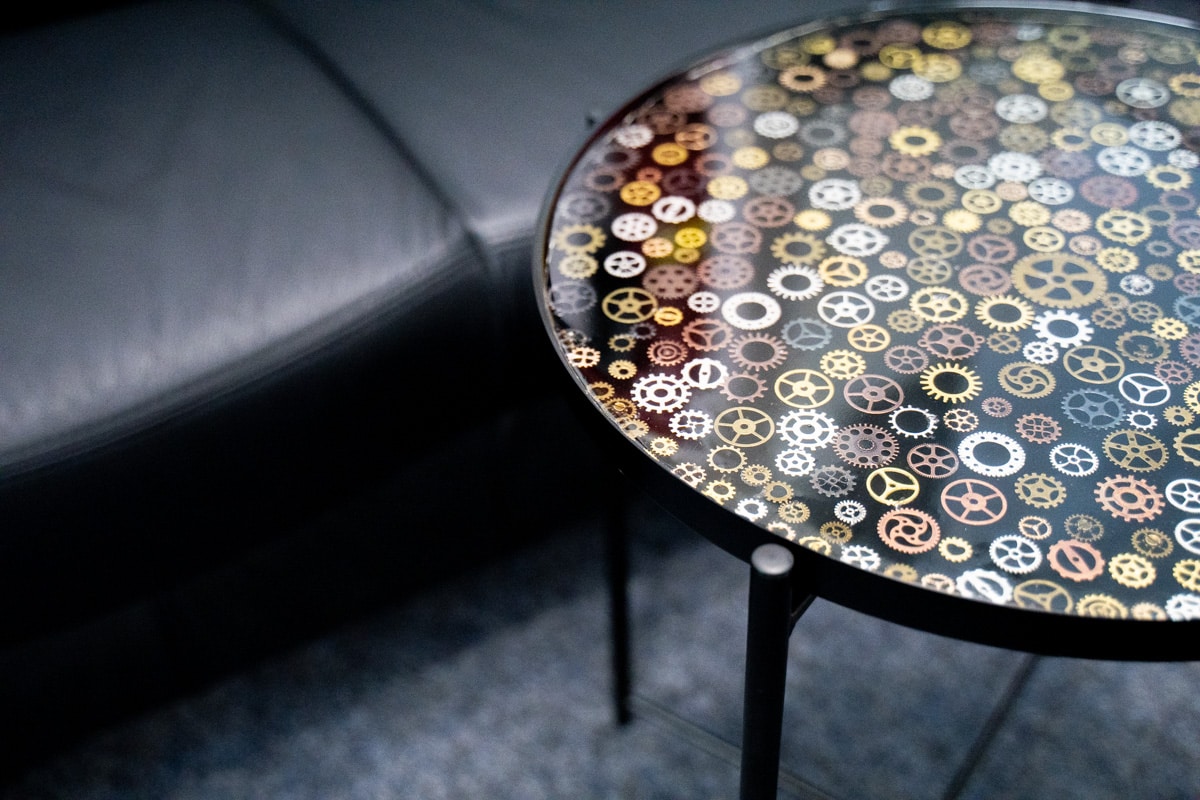
Epoxy resin table with cogwheels DIY
Epoxy resin decoration tables are easy to make yourself and guarantee an individual eye-catcher in your home. In this article we will show you how you can make a table with gears and lighting yourself with just a few tools and in a short time. This project is very suitable for beginners and can also be modified with other objects according to your wishes. In only 5 steps you can cast your cogwheel epoxy resin table with EPODEX:
You need:
- A table with a tray that can be filled up
- Light Wire
- Glueing modeling clay in black
- About 400g cogwheels
- EPODEX PRO epoxy resin system
- Nitrile gloves
- Stir stick
- Mixing cup
- Hot glue gun
- Tweezers

Pouring a table with cogwheels – that’s how it works:
Preparation:
Have all materials ready. Note that you should work at room temperature and the humidity should not exceed 70%. All materials and tools should also be at room temperature. Start by cleaning the table and getting rid of dust. The surface must be grease-free, dust-free and dry before you proceed to the next step.
Step 1: Guide the light wire through the opening of the table and fix it around the inside of the table with the black modeling clay.
Step 2: Put on the disposable gloves and mix the amount of resin and hardener in a ratio of 2:1, which you need for a thin primer layer of about 0.2mm. Pour the epoxy resin onto the table. Leave the primer to gel for 20 hours.
Note: When component B meets component A, the mixture will become slightly milky/streaky. Stir until all streaks have disappeared to obtain a crystal clear result.
Step 3: Carefully apply the cogwheels with tweezers. Since the surface is not yet completely hardened, it can lead to marks and defects if the gears are moved on the surface. When all gears are in place, apply a second thin layer of epoxy resin consisting of the A and B components. Again, make sure that you only mix as much epoxy resin as you need for this layer and wear disposable gloves. Let the layer cure for one day. The second thin layer of primer on the gears is important, as it may cause the objects to outgas. This can cause subsequent bubbles which the defoamer cannot remove.
Step 4: After the 24 hours curing time you can now apply the main layer. Put on your gloves and mix the epoxy resin in the correct ratio. The best way to do this is to use a mixing can, as it offers a large volume.
When the main layer is poured, you have to wait another 24 hours until the table is completely cured and can be loaded.
Tip: If there are any bubbles, you can remove them with a hair dryer. To do this, hold the hair dryer on a small, lukewarm setting at a distance of 30 cm from the table. It is important that you do not hold the hair dryer in the same place for too long.
Step 5: When the epoxy resin is completely cured, the last step is to fix the battery compartment for the lighting under the table with a hot glue gun. Once the glue is dry, your new decoration table is ready.
